Proud to be a child of God,
a faithful son (I hope lol)
a trying to be hardworking student,
a part-time worker,
a nerf/milsim enthusiast,
a crafting and music lover
and an awesome friend.
to you :)
Hope you have an enjoyable time reading about my life,
as much as I have fun living it!
Facebook
Instagram
Twitter
Greenview Secondary School
Pioneer Junior College
Army BMTC: Dragon Company
Army Unit: 30SCE
Army Unit: Signal Institute
Air Force Unit: 3DA
University: University at Buffalo (SIM)
Layout by pinpoint.
Icon by LJ.
The layout name is Minimalist.
(C) All rights reserved.
| |
Click on one of the "X"s to view! :)
I am a university student who loves chocolate! Coffee is my best buddy when it comes to taking on my finals. I have a tendency to want to try and do so many different things at once and as a result, I've found my hobbies to be as such!
Nerfing is one of them, but aside from that, I also love arts and craft. I have my own startup, Thumbforlego at: where I sell my works!
I love to do all sorts of crafting, so you will see me uploading posts of my leathercrafts, thumbdrives, replica guns, nerf gun modifications and gundam models!
I'm fortunate enough to be blessed by really supportive parents and
given the chance to explore many, many parts of the world and try out a plethora of activities. This is also how I discovered my love for film photography, videography and piano.

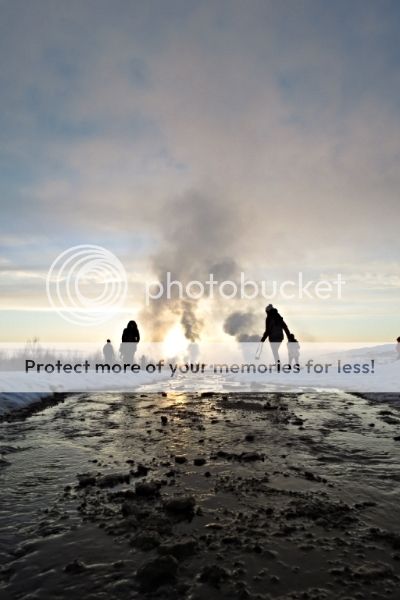
The film photo above is unedited!
My family loves cold countries xD. We managed to catch the northern lights twice!


I've also gotten the chance to experience many of nature's wonders

And my most freezing experience to date: riding a husky ski sled into the sunset (It was -38 to -40 degrees celsius and the huskies were pretty fast.)

Why 36000feetabove?
This is the altitude that commercial planes cruise at and I have always loved the view up in the sky, being amongst the sea of clouds. :)
Personally, my favourite favourite food has got to be airplane buns! Does anyone else feel the same way?! With a slice of butter and looking out of the window, I have yet to find an experience that can beat that.

WOOOO looks like my lameness is ever abounding :P but i am really glad that friday is finally here!! Im still getting used to my mac? It takes some quite bit of adjusting i must say as i've always been using windows for very long and have since been accustomed to win8, but mac is so different! and it's funny how my mac is only 256gb big -.- cant store anything man...i'm only keeping music and word docs on this mac!
School has been really fun because of the company that i had! this week was a really long week, which makes TGIF all the more meaningful! :) Shuks my blue hair dye is fadingggg i so need to get it dyed again! And i am just using my mac to type as much as possible so i can get used to the new keyboard! Using the new mac pro with the retina display, typing has gotten a lil uncomfortable due to the sharp edges along the metallic frame! SO TEMPTED TO MODIFY A NERF BLASTER NOW. Wonder if anyone has the same problems as i! This week's been laden with countless tests/exams and graded assignments, absolutely no fun at all on the amount of mugging we need to do. moreover as you see so many people around you mugging so crazily, peer pressure!! but really, i just cant wait to get my hands on a nerf blaster and mod it >:) i shall begin planning on what kinda blaster i shall modify. hmmmm.... and then next friday! i'll have something to do, other than project work :l wow my pinky finger kinda hurts after typing pretty much for today!
This morning was a terrible morning, i woke up feeling very nauseous and a churning stomach. Of which thanks to food poisoning, i was camping on my beloved toilet bowl at 5am. And i slept at 3am. Practically falling asleep on that toilet bowl. Thank God for whoever designed the toilet, that the basin was so close to the toilet bowl! which made puking sooooo much easier for me. I've haven't puked in YEARS man. so this time was pretty bad eh. Its been past 12 hours and my stomach still isnt feeling too good, leaving me occasionally confiding in my toilet bowl. Moreover, once i woke up, i got leg cramps in both of my legs!! Like as though my morning couldn't get any worse, i realised i missed my piano lesson, and each lesson is $80, without any make up session :( ouch ouch!! what a bad start to a friday morning! but at least the afternoon was spent chatting with such awesome people! and firday is really more of a break as well as an "easy time" for group mates and all to gather for project works and what not.
i spent the most of this week studying! or "studying"! It's really hard to imagine how hard everyone mgs for MCQ papers, i guess we all see the responsibility in us to do well and get those grades! i mean afterall, our parents paid for our hefty school fees! In fact, bro is having a levels, which is just about months away? and we seem to be studying harder than him! and he has prelims coming monday. -_- logic -_- it was really really fun studying with my fellow friends like Cheryl, Sara, Beverly and Xuan! especially the fun time that we had in the library :P dont know studying or playing and fooling around xD
Wednesday mugging was particularly fun because we mugged till 10.45pm in school! so for the early birds like bev and i who reached at 7am, it sure is a long time spent in school! of course not all the time was spent studying HAHA and when studying late into the night, we were like reading air man....absolutely no idea what the textbook was writing anymore. We took a break (LOL we were like on break all the way lolol) but yeah we took our dinner break too late! which left us with a plethora of closed food stalls to choose from! walked to the end of Ngee Ann Polytechnic (NP) but could still find no foodie. So there and then we called pizza hut! haha no worries i do have a photo of us "studying" alright!! but it's really fun to hang out with xuan and bev! as xuan continued to do his design work, bev and i studied! after some time later, quizzup came into the picture, and so did pizza hut :3

At least yesterday when the paper ended, we had time off for ourselves to slack and all! like FINALLY A MUCH NEEDED BREAK but low and behold! this break of ours lasts for probably another 3 weeks before midterm tests 2 kick in. woot and all these happens while the rest of the unis go on their summer holiday. Trimester ftw! :D
VERY LENGTHY POST
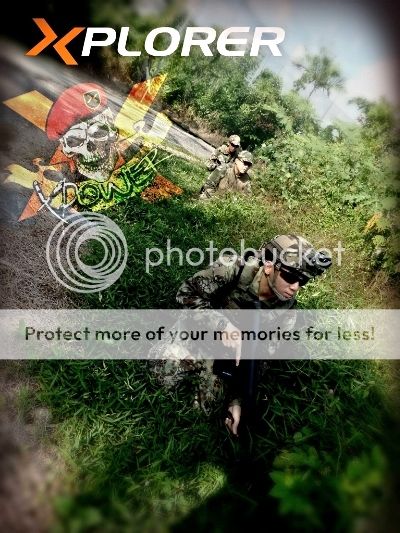
This is a detailed guide on my nerf, Xplorer Longshot.
(Not finalised, went through some more changes.)
Fleur Blanc is the name of my nerf blaster! Well i’ve been pretty into Xplorer and just what is that! its a hobby group with us nerfers using highly modified nerf blasters to compete! it sure is an expensive hobby, but i thoroughly enjoy myself man :) at first i was using the retailiator, which is this!
I’ve always wanted the longshot. The longshot has always been a legend in the nerving community and it is no longer being produced. at least not for now! although rumour is pretty strong that there is a target exclusive i believe? for the zombie strike line of nerf. Luckily, i managed to get my hands on one! Though second hand for obvious reasons, i gave it a good makeover alright! Also, i do have a heavily modified longshot at home, but it is made to shoot stefans which are personalised darts. While my new Xplorer longshot is going to be shooting a more universal stefan! (lol the irony) So…. this blog post is just to show ya how i “refurbished” this longshot! I’ve always had lots of nerf blasters and modified them, instead of getting just one and focusing my resources on one. so this one blaster that i have will definitely receive a lot more attention than the rest! although frankly speaking i really miss modifying other blasters so i am gonna do just about that soon! :P
Before i actually started on any real work, of course i had to do some planning eh! lots of planning like which portions should i paint over, which portions to do which colour. i wanted a blue! that was a pretty much confirmed thing, because my previous blasters have always had that traditional red/matt black look. So this time, i went with something different! I spent about 2 weeks beforehand, researching on the best colour combination before settling for one! I looked through all sorts of pain jobs and tried to play around with the colours in my head :) if there is a particular colour that i want, i’ll definitely get that colour!
Rationale:
After using the retailiator, i had a rough idea on how my blaster performance had to be like to suit my style and also i needed one to be battle worthy, not some "display on the shelf" sort of blaster that had some insanely strong power or what. I needed something practical.
Colour:
Main body dark blue and matt black with grey accenting.
Mods:
Modifying the blaster was made so much easier as Heng, the person who owns xplorer, helped me out with the final tweaking of the blaster! :) really thankful that he is willing to help me out with the calibration and all! Good thing is that then, i wouldnt have to be spending much effort on the modification of this blaster, unlike previous versions! and to those who knows this term, my previous longshot is angel breeched! most of my nerf blasters, i would have to modify the internals but not for this! :)
The following pictures are the internals of the blaster! and thats the main configuration and the power behind this blaster! :)
this is how it looks like before...
and after!
I noticed that the shell was kinda dirty, and the main thing i had to do was to give it an awesome paintjob! Also, my metal barrel was later on switched to a slightly longer one that sticks out of the orange muzzle so as to accommodate the xmuzzle. :)
After giving it a good scrub with soap and brush, and drying it all up, everything looked as good as brand new! hehe sorry i had to paint over the rarer blue longshot instead of a yellow one :P and now...to get down to the paintjob!
the coats of paint sequence are as follows, only spray paint was used. prior to the actual paintjob, i tested out the various colour combinations that I've thought of on plastic spoons. I especially love to use this step just to be safe that the combinations look good. On the top right, you can see how nice the blue turned out huh! the rest were just tests.. played around with the 5 colours as shown above.
I tested out the paints in...
#1.different humidity levels
#2 different finishing coats (gloss/matt)
#3 different basecoats
This allowed me to achieve my intended colour, and i deduced that humid weather would be the best weather for me to spray paint in! For starters...humid weathers may get a bit dangerous as at times it might cause the whitish powdery coat when drying if the layer of paint is too thick at one go. the steps are as follows! :D
- 3x base coat of TS-38 Gunmetal Silver (a bit overkill lolol)
- 2x thin layers of TS-51 Racing Blue
- MASKING
- 2x layers of TS-48 Gunship Grey
- MASKING
- 2x layers of RJ acrylic matt black spray paint
- REMOVE MASKING
- 1x layer of matt coating (also acts as protective layer)
After all is done, then i had the joy of finally peeling off the layers and seeing all my hardwork! this process of paintings took up over 2 weeks of weekends to get em done! spray painting in the night or just-rained weather is the best, when the air is still moist. Here are some of the photos of the process.
you can see exactly how blue it turned out! the trick is...it is only THIS blue when under light and without the matt coat. I planned so that after removing all the masks, then i will go over with a layer of matt coat instead of now, to reduce redundant layers. The blue will change drastically after the matt coat is applied. All the taped up portions are the parts i'm keeping blue! this process of taping took me like TWO nights. but very precise.
I did a marking of "22" at the left side as it was one of my 22nd birthday presents from my parents, so during the spraying of gunship grey layers, thats when i painted a portion white and came in with the stickers to leave the white paint there as i later sprayed over with the matt black layer. This way when i peel it off later on, i'll get a white "22" with black background!
Went on to spray the buttstock..
Good to spray in the night :)
Okay see those yellow "tags" i have? they simply indicate the portions of black that i'll need to go over to make those parts thicker. this is so as to prevent any of the other colours being visible in the black region/ The matt black is supposed to fully cover up the paint marks.
I also used the felt stickers for this portion, before spray painting them over with gunship grey too! and to spray over a nice layer of metal... kinda heart pain but oh well! :P
Wow the image seems a little blurred, but that's the almost finished product!! what happens next is that i have to come and clean up those letters and make sure every one can be easily seen too :) tape becomes our best friend for the next half an hour. I use painter's tape to remove any excess as they're pretty clean! although my fingernails have proven to be more worthy than the tape, carefully scraping off the excess.
THIS is the finished product! nahhhhh not quite yet! what happens is that i love to use a wet cloth and keep rubbing the entire piece so as to ensure that the paintjob is nice and smooth! Also, as that '22' looked too clean, i used painter's tape to stick some black dust remains from the matt black and dab the number, leaving it with a weathered look when done! The wet cloth helps to remove any of those rough surfaces you might get if your paint does not dry properly.
and this is when you are truly....DONE!!!!! below are the finishing images of it, and i also did further spray paint the orange parts and add on the muzzle :)
Top is obviously the fleur blanc, the bottom one is my old longshot, the angel breeched longshot, with a brass barrel and aluminium boltsled! As you can see, the blue has become a whole lot different and less glossy as compared to the one that was masked at first!
What makes my paintjob so special? IT'S THISSSS when my blaster is brought into a slightly darker environment, notice how the blue begins to fade into a darker shade?? also, you can see the vastly different aesthetics huh!
Into an even darker environment, it blends into black! :D HAHA I JUST SO LOVE HOW THIS PAINTJOB TURNED OUT. It's like a self camouflaging paintjob dont ya think!! Finally those weekends of painting and masking finally paid off!!
But i am not done yet, it further underwent adjustments later on! :)
COMMERCIAL BREAK
I re barrelled and modified a non-nerf spongebob blaster to shoot nerf darts at a longer range and gave it to charlene! :P It was shooting some fatty darts at first...took me bout an hour to mod this!
HERE IS THE COMPLETED BLASTER OF MINE,
- painted orange external parts to black
- added a xmuzzle in front with a 1/2 inch spacing?
- extended metal barrel to accommodate muzzle.
Thank you sooooo much for reading to the end of this very very very long post!!! hope it was educational for the paintjob :) the internal parts are all precision engineered by Xplorer's factory machines, according to Heng's designs!
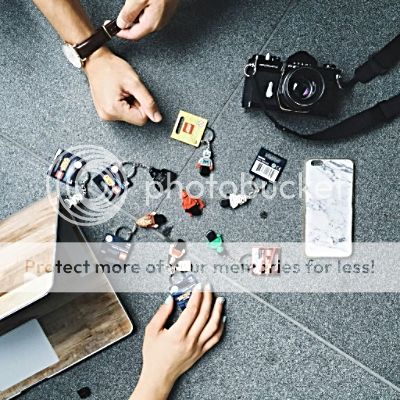
HAHA another blog post! this time, i’m using my macbook on the bus on the way home hehe :P it’s kinda squeeze in the bus….but i think i am getting eyes from around me, with others thinking that i am a studious student lmao. wish this bus was a double decker. But ANYWAY, i made my third LEGO usb keychain!! turned out pretty nice although there are crappy parts, but here is how i did mine, will be sharing my method here. :) I've been making these for some time, just that i've never documented down the process as they were meant for gifts. Whereas the one that i just completed last night was meant for myself!
I chose the LEGO keychain instead of a simple mini fig due to a few reasons. Firstly, the LEGO keychain already comes with an extremely secure keychain, that has people talking online about how to remove it. So THAT’S secure enough. LOL the people boarding are simply avoiding the seat next to me, although i stacked up everything onto my legs. The main issue/worry that i had with the keychains was how long exactly was the screw going to extend into the lego min fig. because this has a very very big part to play, when it come to the inserting of the USB into the body. Although being pricey, the lego keychains also means that i wouldn't have to worry about stringing my way. All i needed to do was pretty minimal, Dislodging/destroying it’s lower half, gutting out the insides and gluing in a new thumb drive that is mini enough to be slotted in. That was initially hard to find as most thumb drives are bigger than the torso of the mini fig. But after combing through the internet, i’ve finally found this thumb drive that works best, because of how compact it came in! :)
Let's dive right into the "instructable"!
Firstly, you'll need some tools at hand aye? You'll need...
1. A LEGO keychain
2. One SanDisk thumbdrive, or any thumbdrive small enough. (keep it sealed first)
3. Marking knife or a blade that is sharp enough to cut through plastic, NOT penknives.
4. Plastic nipper. a plier should do the job too, one with thin tips.
5. Plastic spoon to hold the glue
6. Quick drying Epoxy glue. Or any glue that is strong enough. please no UHU super glue.
7. Chopsticks. Because i'm budget.
There's an overall photo at the end so anything unsure, head to the bottom!
A word of precaution, you'll be working with extremely sharp tools, frankly speaking i love the marking knife so much because it has unbeatable sharpness. So do exercise caution especially when you are not familiar with the tool. NEVER hold onto the piece and cut with the other hand because if you slip....it'll slice right into your finger bone. Happened to me, yup. Always cut away from you.
i've highlighted some IMPORTANT parts for you to note so you wont miss anything out on those steps! :D
Firstly, begin to pry out the legs in an outward manner sideways. This should free up the legs pretty good :) You should be left with just a thin piece of round plastic in the middle. Then, come in with your plastic nippers and beginning nipping off those plastic leg pieces, or whatever you're left with. For this part, you got to be really careful not to snip off that portion of torso. If you notice, you can see how i'm sniping off the parts and leaving the torso clean. Cleaning up of the torso area comes later. It is important to keep this border as clean as possible as it will be visible for the end product.
As you continue to snip or occasionally stabbing it with the marking knife, you should end up with a product like the photo below. All you should have are the stump pieces. These parts are firmly stuck to the torso also because of the glue that LEGO applied previously, locking the legs to the main body.

Come in with your marking knife. This is the part that the marking knife will prove to be godly. lolol. because it is thin and VERY VERY sharp, it will make pretty nice cuts at the sides of the stump. Cut at the four points per stump that is in contact with the torso. This should allow you to pry out the stumps with your pliers. BECAREFUL though, that if you jab it inaccurately or crank it just a little too savagely, you'll create this whitish marking on the LEGO torso. This CANNOT be removed at all. i repeat, CANNOT be removed. So be very careful not to screw up the torso that you've painstakingly isolated! The whitish portion is called a plastic fracture, whereby the cut on the plastic.was not made clean and fast enough, causing the plastic to "fracture". Try to keep such stuffs to the minimal if not your end product will look shabby.
After gorging out the insides, it SHOULD look something like this in the photo above, with the middle posts being trimmed down IMPORTANT by around half of the torso. For this step, you should open up your thumbdrive and beginning shaving down the sides of it. you can do so by using the marking knife, keep the part that you want to shave off 90 degrees from the cutting board, angle the blade and shave off layer by layer. Do not be ambitious and slice off a large portion as it becomes pretty stiff! you wont want to risk losing control and slicing your fingers eh! simply slide it down and let the blade meet the cutting board. Repeat this process until you get a nifty shaved down thumbdrive that will fit nicely into the torso! you'll need to shave up the four sides, but don't shave off too much. You can do so by test fitting it from time to time so you'll know which sides to shave.

After testing it out and ensuring it fits, make sure that you're gonna be inserting the thumbdrive the right way. What do you mean by right way? when you insert the thumbdrive into the computer/laptop, you will NOT want the minifig to be facing the other direction huh! In the case of the thumbdrive that i use, the capacity would be the front, which is a neat 64GB!! :D that's like a quarter the size of my macbook pro disk space! What i really like about it is that you can easily see the capacity in front, and the finished product is pretty neat!
the FINAL MOST IMPORTANT, MOST CRUCIAL step, is to make sure that you have mixed 1 part each of the two part epoxy that you've gotten hands on. Of course you wouldnt need too much, i tend to do about half a thumb's worth or 20cents worth for each part, making it a total of 40CENTS!! just kidding. But yeah, two, 20cent worth of each part. Mix it evenly, dont mix it too thoroughly especially if you're using the quick dry ones. i reccomend the quick dry ones because they set easily, allowing you to make minute adjustments on the way as you slot in that thumbdrive. Once you're done mixing, straight away apply it around the thumbdrive. Hold it there for about 2minutes plus? and your desired position would be fixed. if it gets messy, use a cloth or something to remove the excess. Tissue paper isnt really recommended. Come to worst, let it settle a bit before scratching the excess glue on the torso using your fingernails. Painfully slow process. IMPORTANT Dont forget to fix back the arms if you took them out too! Personally i like to let the glue cure for an exceptionally long time, usually through the night. VERY VERY IMPORTANT Also, make sure that the arms are not glued down. Ensure by twisting the arms from time to time as the glue cures. if you do not ensure this and allow the epoxy to cure and fix that arm, you're never going to fit that thumbdrive into your computer because the arms jut out. When it's all done curing, you can slot the cover that the thumbdrive came with and pray that that cover doesn't go missing any time soon!
As i am familiar with the using of a marking knife, i cleaned out the bottom border of the torso area so that it'll seem a whole lot cleaner. This happened before gluing. Do not try to do this if you aren't confident in doing so! because LEGO has a very hard plastic, making it easy to fracture. and if you slice it unevenly, that process will continue till you've shaven off half a torso just to get an even cut all around. pretty sure of that.
At the bottom, is the overview of all the tools you'll need to make an identical LEGO minifig/USB keychain of mine! Hope that it helps! :)
DEEPLY SORRY GUYS FOR NOT BLOGGING FOR SO SO LONG!! Reason being i have been Xtremely xtremely busy with school, and nerf that i can barely manage! As i am typing this, my nose skin is peeling....zzzz after a whole weekend under the hot sun, i sure am cooked like a lobster! Ever since past my piano studio thingy, i haven't had much spare time as i prepped for friend's birthdays and all :) but it's been a really fulfilling period so far!! Doing relatively good in school, and i must say, uni life is really fun! well at least that's the case for SIM/UB :) i'm enjoying myself in school, also because of the company that i have, and mah BUS BUDDY!! that's like the most important person HAHA without her, i'll be super duper gloomy and lonely every morning otw to school as it's a pretty long ride. And who likes to wake up so early just to bard the bus huh! I really wanna catch up on my anime, but i guess i'll blog first. pretty sure i wouldnt have sufficient time to watch anime later on already :P LOADS and LOADS of things to talk about, but i am glad that i've finally GOTTEN A LAPTOP like FINALLY >>>>>>> Is it an overkill to have a desktop and a lappy? probably so :x but i really need one for school work and all. For the first time in my life, i actually typed out my essay in the car. like how cool and convenient it is alright! Thankfully, i was blessed by my mum with a 15" macbook pro! Did i mention that i wanted that in my previous blog post? the newer one they have is really really light, although i have no idea what i can do with the 256Gb of space... frankly speaking, my photos alone are already 250Gb, let alone videos and music. so..... HAHA of course i had that pre-empted so i laid my hands on a 1Tb external hard disk. Now that can fuel my data appetite alright! :P
Comparing stats wise with my desktop, the laptop is indeed a downgrade, afterall i built my PC with gaming specs, so graphic card my PC obviously wins hands down since there isnt one in my lappy. PC has 4 times the data capacity and two times? The ram. the only thing that beats my PC is the core, i7 as compared to my i5. But my macbook really serves it's purpose well, that it's really easy to use and once you get used to that multi touchpad, you can do wonders with it man...Dammit my arms are itching all over. oh! i had such a fun time running and gunning at the Xplorer Event, XShot. To keep things short, it's a competition based on timing, have to run through the course and hit all of the targets :) it was the first time using my newly modded Longshot, with it being nicely painted too! hah afterall i was the one who did the paintjob, but i must say i'm really satisfied with how the paintjob turned out, after pouring in lots of hardwork and planning! The planning part is the toughest one as i got to decide what areas to tape up, and the sequence of paints to use, after painting, mask over more layers, paint again, and the painful process continues on for days. Colour was another big factor. Like exactly what kind of colour should i choose for my Longshot? Afterall, it is going to be my primary blaster for a long time. Anyway, this blog post isn't catered for my Longshot, i'll do a dedicated one for it so here are some of the pics of the event, Courtesy of Heng from Xplorer! Thank you Heng for the event and the photos!! I came in 7th place....so.....haha kinda sucks, but the main thing is that i got to really know more about my blaster performance, so i'll know how to fine tune it better in the future! :) gotta go back home and try out more stuffs aye!


After the Xshot event, i had to rush off home and begin writing my essay! Which explains how busy i am. And that is sunday. Whereas my saturday was fully taken up by church, had an event, Invasion!!! and it was a fun time basking in the sun and fellowshipping with my church mates :) had lotsa fun on saturday!! hehe and yes sunday too was fun, and what was neglected? my essay! :D so by the time i finally had the chance to start on my essay, it was already 10pm in the night which kinda sucks.... by the time i finished it up, it was wayyyyyy past 12am. And for you to wake up earlier just to go school, it sucks even more :( and well the same thing happened to me for the previous weekend lolol i guess you can foresee what's gonna be happening this sunday evening eh?! :P
OH GOSH it's kinda late, guess it's time for me to sleep! and i actually intended to blog on something else....maybe i can explore the option of blogging on the bus on the way home :) because early in the morning, i'm gonna be wayy too cranky to type anything sane man. and i'm already weird as hell on a normal day xD on an early weekday morning? HOHO. The plight of my bus buddy :P
|


